The supplier hasn’t listed a price. We can get their current prices and MOQ.
Verify from $29 · written report in 3 business days · 100% refund if unreachable
The supplier hasn’t listed a price. We can get their current prices and MOQ.
Verify from $29 · written report in 3 business days · 100% refund if unreachable
From the supplier
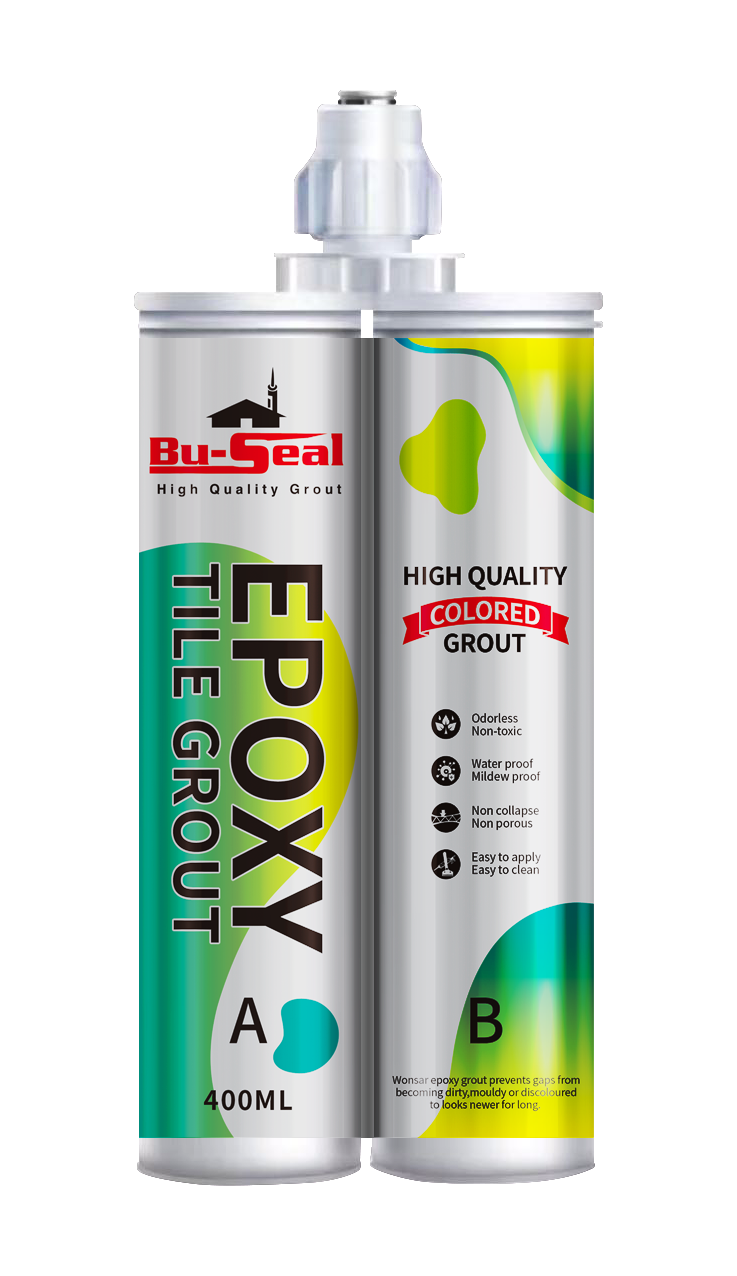
WONSTAR EPOXY TILE SEALANT DESCRIPTION
Epoxy tile sealant is an upgraded product of the sealant, and its decorative practicability is obviously better than that of the color sealant. It solves the problems of bad looking and dirty tiles.
The traditional sealant is applied on the surface of the sealant. The new sealant does not need the sealant as the bottom layer, and can be directly added to the gap of the tile after the tile is bonded. It is suitable for gap filling of more than 2mm, and the construction is more convenient than the ordinary type. It is an upgraded product of sealant.
Glue gun, sponge, water scraper, joint cleaning tool, material receiving plate, water basin, towel, etc
Glue gun - glue application tool, used to apply sealant;
Sponge - three functions, working closely with a water scraper, and using a leveling agent alone, similar to a towel for cleaning;
Water scraper - leveling agent;
Joint cleaning tool - wallpaper knife or special joint cleaning tool for seam sealant (flat head cylindrical screwdriver), which is used to remove the joint sealant in the tile gap;
Water basin - half basin of water is used to wet towels, clean sponges and water scrapers;
Towel - used to wet about 7cm edges of tiles on both sides of the gap after wetting;
Gloves - waterproof after wearing, which can prevent the seam sealant from touching hands;
construction
Full fill
Full filling construction: the tile gap is empty, and there is nothing in it. Fill the sealant directly; Generally, it is necessary to apply the sealant 2-3 times, or even more times; The cost also doubled.
Half fill
Semi filling construction: tile gap shall be filled and filled with jointing agent; Use the joint cleaning tool to clear the edge of the ceramic tile (for bonding the joint sealant); The depth is about 0.8mm; Inject the sealant once.
Construction process
1. Horizontal first and then vertical: clear the tile gap (the wallpaper knife is placed horizontally; the blade is parallel to the edge of the tile; the blade is almost parallel to the ground)
Groove of about 0.8mm; Both sides of the groove can be exposed to the edge of the ceramic tile; Ps: The intersections must be cleaned;
2. Clean the dust inside the ceramic tile gap: use a vacuum cleaner or a broom to clean it; It must be ensured that there is no moisture, dust or particles in the tile gap;
3. Take out the appropriate color of the seam sealer: tear off the label on the buttocks, stick it on the bottle of the seam sealer, and pull off the pull ring. Let the seam sealant stand on the ground, hold a nozzle of the seam sealant with your left hand, place the tip downward at the outlet of the seam sealant, cover the left hand holding the nozzle with a wet towel, and pat the nozzle with your right hand to open the outlet of the seam sealant. (The purpose of covering with a towel is to prevent the seam sealant from spraying out of the discharge nozzle ---- there is pressure in the tank); Or directly poke the seam sealant outlet with a pointed object;
But pay attention to prevent the seam sealant from spraying on the wall, ceiling or body;
Screw the discharge nozzle onto the discharge port of the seam sealant; Loading glue gun; Prepare to apply glue;
Wet the tiles on both sides of the tile gap with a wet towel; However, the tile gap must be clean and dry (this detail must be noted!!!)
4. Apply a piece of seam sealant: for beginners, you can apply 20cm --- 50cm first, and then you can apply it to a longer length after becoming proficient,
Then lay the glue gun flat; The lower part of the discharge nozzle is connected with a receiving plate;
5. Flattening agent: (water scraper is mainly used; sponge is used; fingers can also be used)
Ps: Water scraper holding method; Four fingers are on top, thumb is under the water scraper, and the excess material scraped by the water scraper is transferred to the sponge.
Continue 3, 4 and 5 steps until all horizontal lines are scraped with the sealant; The surface of the sealant will solidify in about 20 minutes; It feels that all vertical lines can be made after the beauty suture is solidified;
6. Within half an hour: use a wet towel to clean up the residual joint sealant on the tiles on both sides of the tile gap;
7. After 24 hours; Normal use.
The above is the method of wiping off the seam sealant after it has solidified for half an hour;
There is also a method on the Internet to wipe the seam sealant directly when it is scraped flat
There are mainly the following steps:
1. First, make preparations before construction, deal with the ceramic tile joints, and use a small shovel to shovel a groove with a depth of less than 2mm. This is not only convenient to apply the sealant, but also can avoid excessive wear in the future if the sealant is stored in the groove.
2. Then use a small brush to clean the dirt.
3. After the preparation is completed, the seam sealant can be opened. First, use a small awl to open the mouth of the seam sealant, and then install it on the glue gun. Because the method of installing the glue gun is relatively simple, it is driven along the brick seam.
4. Once a brick joint is made, use a scraper to smooth the tile joint sealant.
5. The new type of seam sealer is quick drying, so you should use a wet sponge to clean it when it is more than 10cm, otherwise it will be difficult to clean.
6. After two hours of construction, the surface is completely solidified, and the 24-hour construction surface can be used normally.
advantage
1. New material: it is composed of high-tech new polymer and high-grade pigment. It is a semi fluid liquid. It is different from white cement and color sealant (dry powder cement material+low-grade pigment). It is mainly composed of inorganic materials. It is made of high-tech new polymer material+high-grade pigment and special additives (main materials include epoxy resin, aspartic polyurea resin, MS, etc.).
2. New vision: it has luster, rich natural and delicate colors, such as gold, silver, pearlescent, etc., while the chromaticity of white and black is obviously higher than that of white cement and color joint filler, bringing better overall effect to the wall, so the decorative property is much stronger than that of white cement and color joint filler. And after solidification, the surface is as smooth as porcelain, which can be scrubbed together with ceramic tiles. It has the characteristics of impermeability and waterproof, and can achieve the true gap of ceramic tiles "never darken"
From the supplier
WONSTAR EPOXY TILE SEALANT DESCRIPTION
Epoxy tile sealant is an upgraded product of the sealant, and its decorative practicability is obviously better than that of the color sealant. It solves the problems of bad looking and dirty tiles.
The traditional sealant is applied on the surface of the sealant. The new sealant does not need the sealant as the bottom layer, and can be directly added to the gap of the tile after the tile is bonded. It is suitable for gap filling of more than 2mm, and the construction is more convenient than the ordinary type. It is an upgraded product of sealant.
Glue gun, sponge, water scraper, joint cleaning tool, material receiving plate, water basin, towel, etc
Glue gun - glue application tool, used to apply sealant;
Sponge - three functions, working closely with a water scraper, and using a leveling agent alone, similar to a towel for cleaning;
Water scraper - leveling agent;
Joint cleaning tool - wallpaper knife or special joint cleaning tool for seam sealant (flat head cylindrical screwdriver), which is used to remove the joint sealant in the tile gap;
Water basin - half basin of water is used to wet towels, clean sponges and water scrapers;
Towel - used to wet about 7cm edges of tiles on both sides of the gap after wetting;
Gloves - waterproof after wearing, which can prevent the seam sealant from touching hands;
construction
Full fill
Full filling construction: the tile gap is empty, and there is nothing in it. Fill the sealant directly; Generally, it is necessary to apply the sealant 2-3 times, or even more times; The cost also doubled.
Half fill
Semi filling construction: tile gap shall be filled and filled with jointing agent; Use the joint cleaning tool to clear the edge of the ceramic tile (for bonding the joint sealant); The depth is about 0.8mm; Inject the sealant once.
Construction process
1. Horizontal first and then vertical: clear the tile gap (the wallpaper knife is placed horizontally; the blade is parallel to the edge of the tile; the blade is almost parallel to the ground)
Groove of about 0.8mm; Both sides of the groove can be exposed to the edge of the ceramic tile; Ps: The intersections must be cleaned;
2. Clean the dust inside the ceramic tile gap: use a vacuum cleaner or a broom to clean it; It must be ensured that there is no moisture, dust or particles in the tile gap;
3. Take out the appropriate color of the seam sealer: tear off the label on the buttocks, stick it on the bottle of the seam sealer, and pull off the pull ring. Let the seam sealant stand on the ground, hold a nozzle of the seam sealant with your left hand, place the tip downward at the outlet of the seam sealant, cover the left hand holding the nozzle with a wet towel, and pat the nozzle with your right hand to open the outlet of the seam sealant. (The purpose of covering with a towel is to prevent the seam sealant from spraying out of the discharge nozzle ---- there is pressure in the tank); Or directly poke the seam sealant outlet with a pointed object;
But pay attention to prevent the seam sealant from spraying on the wall, ceiling or body;
Screw the discharge nozzle onto the discharge port of the seam sealant; Loading glue gun; Prepare to apply glue;
Wet the tiles on both sides of the tile gap with a wet towel; However, the tile gap must be clean and dry (this detail must be noted!!!)
4. Apply a piece of seam sealant: for beginners, you can apply 20cm --- 50cm first, and then you can apply it to a longer length after becoming proficient,
Then lay the glue gun flat; The lower part of the discharge nozzle is connected with a receiving plate;
5. Flattening agent: (water scraper is mainly used; sponge is used; fingers can also be used)
Ps: Water scraper holding method; Four fingers are on top, thumb is under the water scraper, and the excess material scraped by the water scraper is transferred to the sponge.
Continue 3, 4 and 5 steps until all horizontal lines are scraped with the sealant; The surface of the sealant will solidify in about 20 minutes; It feels that all vertical lines can be made after the beauty suture is solidified;
6. Within half an hour: use a wet towel to clean up the residual joint sealant on the tiles on both sides of the tile gap;
7. After 24 hours; Normal use.
The above is the method of wiping off the seam sealant after it has solidified for half an hour;
There is also a method on the Internet to wipe the seam sealant directly when it is scraped flat
There are mainly the following steps:
1. First, make preparations before construction, deal with the ceramic tile joints, and use a small shovel to shovel a groove with a depth of less than 2mm. This is not only convenient to apply the sealant, but also can avoid excessive wear in the future if the sealant is stored in the groove.
2. Then use a small brush to clean the dirt.
3. After the preparation is completed, the seam sealant can be opened. First, use a small awl to open the mouth of the seam sealant, and then install it on the glue gun. Because the method of installing the glue gun is relatively simple, it is driven along the brick seam.
4. Once a brick joint is made, use a scraper to smooth the tile joint sealant.
5. The new type of seam sealer is quick drying, so you should use a wet sponge to clean it when it is more than 10cm, otherwise it will be difficult to clean.
6. After two hours of construction, the surface is completely solidified, and the 24-hour construction surface can be used normally.
advantage
1. New material: it is composed of high-tech new polymer and high-grade pigment. It is a semi fluid liquid. It is different from white cement and color sealant (dry powder cement material+low-grade pigment). It is mainly composed of inorganic materials. It is made of high-tech new polymer material+high-grade pigment and special additives (main materials include epoxy resin, aspartic polyurea resin, MS, etc.).
2. New vision: it has luster, rich natural and delicate colors, such as gold, silver, pearlescent, etc., while the chromaticity of white and black is obviously higher than that of white cement and color joint filler, bringing better overall effect to the wall, so the decorative property is much stronger than that of white cement and color joint filler. And after solidification, the surface is as smooth as porcelain, which can be scrubbed together with ceramic tiles. It has the characteristics of impermeability and waterproof, and can achieve the true gap of ceramic tiles "never darken"
About the supplier
Main products: Other chemical products
- ✓Exhibited at 10 of the last 10 Canton Fairs
- ✓Foreign Trade Company
- ✓Founded 2015
- Exhibited at 10 of the last 10 Canton Fairs
- Foreign Trade Company
- Founded 2015
Similar products from other suppliers